“Bold Move” is almost ready for blocking! Here are some Annetarsia tricks that I used to make the knitting easier. If you are making the Medium size (38″ hip measurement), using Size 5US needles, and are close to the stitch and row gauge stated in the pattern, then my numbers for vertical strand length will likely work for you.
I calculated the vertical strand length by measuring the Yarn Gauge of the Plucky Knitter Traveler Sport used as the MC. The vertical strands are actually done with Primo Fingering, which has a smaller Yarn gauge. But I round up in every step, so I did the Yarn Gauge swatch with the larger (Sport) yarn. Yarn gauge is something I teach in classes (there might still be space in the Stitches MidWest class!), and it will be in “Annetarsia Knits”, as well.
My Yarn gauge for Traveler Sport is .53. I used this number to calculate the yardage used for all 32 butterflies needed. Here are my suggested lengths, rounded up to the nearest 1/4 yd. You will need 2 of each length, one for each side of the skirt.
1. 1.75 yd 2. 2 yd 3. 2.5 yd 4. 2.75 yd 5. 3.25 yd 6. 3.5 yd 7. 3.75 yd 8. 4.25 yd
9. 4.5 yd 10. 5 yd 11. 5.25 yd 12. 5.75 yd 13. 6 yd 14. 6.25 yd 15. 6.75 yd 16. 7 yd
In order to avoid end at the hem, I cut a length for 2 strands at a time, then knit from the middle. This means I only cut 16 pieces, not 32! I doubled the number of the longest strand of the pair (remember, you always round up!). So I had 2 each of the following 8 lengths:
1. 4 yd 2. 5.5 yd 3. 7 yd 4. 8.5 yd. 5. 10 yd 6. 11.5 yd 7. 12.5 yd 8. 14 yd
Then I started on Row 1, knitting in the middle of each strand. I ended up with a little extra yarn in a few spots, but using the varying lengths greatly reduced the weight of the project and made the knitting easier.
A little time spent in Yarn prep can pay big dividends. My measuring more exact lengths of yarn needed, I simplified the knitting, and reduced yarn waste. Good things!

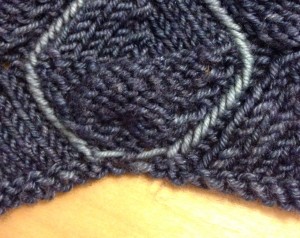
This is a close-up view of the hem. See where I started knitting from the middle of the yarn length, then stranded over to where the next vertical line starts. On row 2, I moved up on each side with the yarn that was handy.

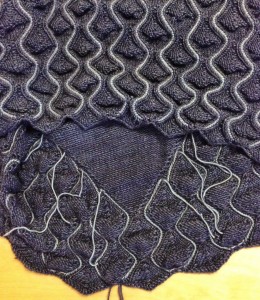
This is the wrong side of the skirt, where you can see the ends to be woven in at the top of the stranding. Above, you see what the work looks like on the RS. The fabric will flatten and smooth, with blocking. I rather like the puffy look, though!

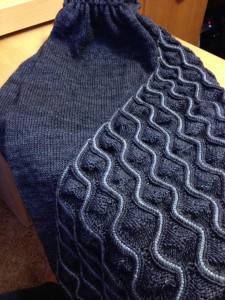
This is a view of the entire skirt, seen from the RS. I am knitting the waistband, which you can see at the top of the photo. None of the ends have been buried yet, but you can see that it really doesn’t matter. They are quite secure.

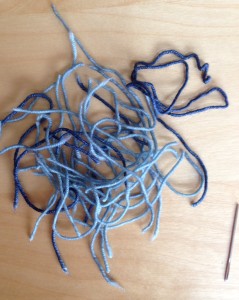
This was all of the ends, from the whole skirt! I think the Yarn Gauge calculations and measurements did a very good job! If I hadn’t worked from the middle of the lengths, there would have been twice as many ends. It was worth it to me to measure the longer lengths and cut the number of ends in half.

Lorilee
annetarsia