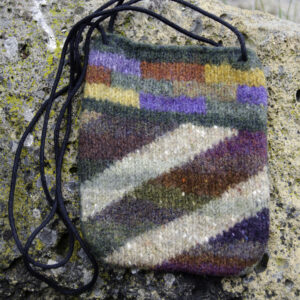
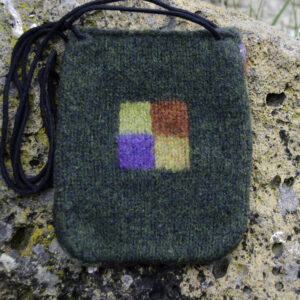
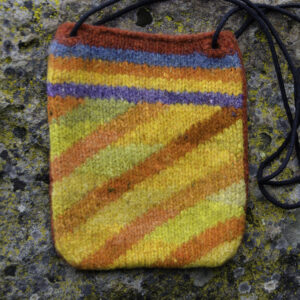
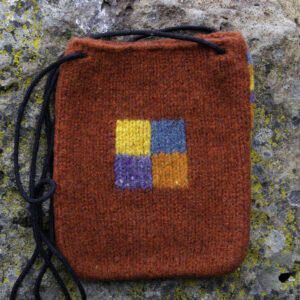
Today I am putting the pattern many of you have been waiting for on sale in my Ravelry store! The pattern for Nancy’s ColorPlay bag was cut from “Annetarsia Knits” due to space concerns. However, overwhelming love for the bags and requests for the pattern have led to us releasing it. Nancy and I welcome the chance to raise funds and awareness for Doctors without Borders. Ebola and other world-wide disasters have stretched this organization very thin, and this is a great time to show them support.
The bags that Nancy contributed to “Annetarsia Knits” brilliantly convey the power of playing with color. I’m a good technician, but to get the full impact of intarsia you have to be willing to play with color. Most knitters are nervous about combining colors, and fret that our choices aren’t “right”. But with practice and patience, we can relax and create beautiful stuff, while using up stash and having fun while we do it!
My job is to make it easier and less stressful. So, here goes. First, don’t worry too much about what yarn you use. Nancy has an enormous stash of Harrisville yarns, and I know for a fact that this is why she used them. The bags will be no less beautiful, fun to knit and useful if you draw from your own stash of whatever felt-able yarn you have. Don’t even bother knitting a gauge swatch. Knit a bag instead, and felt it! Use that first bag to decide if you want to go larger, smaller, change needle size, change yarn, etc.
Yarn supplies: Use single strands, of about arm’s length or a bit longer. They will untangle easily, and will be used up quickly to remind you to change colors. Or, if you want to keep the same color, spit-splice to easily join more yarn.
Knitting needles: Working with one or two needle sizes larger than customary for a yarn weight often aids felting, as the stitches have room to shrink comfortably. Try it with your first bag. For working the front and back flat, I would use a straight needle – even a long dpn. Using a straight needle keeps the yarn supplies separate, avoiding tangles. For ITR, this bag would fit nicely on a 16″ long circular needle, and that is what I recommend. If you knit on the tight side, feel free to add a few more stitches to fill up the circular needle.
How much yarn do you need? A better question would be, how much yarn do you have? As soon as you use some up, add another color! Remember that the object of the project is to play, and using what you have is a terrific way to do this.
Dealing with ends: Burying ends is always fast and easy. But you can keep ends to a minimum by spit-splicing all of your yarn, even when you change color! The spit-splice will be bi-colored for the few inches of join, but it won’t be obvious in the finished bag. If the multi-colored section bothers you, use the Russian join instead. You can create your own colorways – try it! Who knows? One of you might turn out to be the next Eisaku Noro!
Working in-the-round (ITR): This bag can easily be knit ITR. Work both the front and back at the same time, and reduce the total number of sts by 4 (1 selvedge stitch on each end of both charts). So, you will cast on 60 total sts, instead of 32 each for the front and the back.
Reasons to convert to work ITR:
1. If you want to put all of your stitches on a 16″ circular needle. You will still be turning your work at the end of each round, though, so you won’t get out of purling.
2. If you don’t want to sew up the bag with mattress stitch, and want a completely seamless circle.
3. If you want to chart your own motif, and plan for it to wander over where the seams would be.
What if you want to create your own motif for a bag?
1. Draw your motif on graph paper (or a swatch) with the same number of stitches and rows as the bag, so that you know it will fit. Or…
2. Draw your motif on white paper and cut it out. Using the window left by removing the cut-out, place it on top of graph paper (or a swatch) with the same number of stitches and rows as the bag. Color in the motif, and use that to create your chart. Or…
3. Create a free-form motif, adding yarn randomly – whenever and wherever you feel like it!
Nancy and I both want you to have fun with this – a non-stress project that will be enjoyable to make and share. We hope that you enjoy the ride, detours and all!
The pattern is available on Ravelry for $2. All proceeds will be donated to Doctors without Borders, for their important work. Buy the pattern HERE!


